


As part of a fine gardening and landscape design company called Wild Violets, I am very fortunate to work in many stunning ornamental gardens and veggie gardens, and I spend a lot of time around flowers. That said, one of my all-time favorite parts of the job is planting window boxes and containers. Each one is a little work of art that keeps on giving through the season. As the plants grow and the containers become more lush, their beauty evolves.
With our spring season on the Vineyard just beginning (and with a little extra time on our hands this year), now is a great time to look for inspiration for the coming months. I’ve taken a look back at some of my favorite combinations and gathered some general pointers for you on planning, planting, and caring for your pots and window boxes at home.
(Scroll down for photo gallery.)
Getting Started
Choose your container. First, figure out what you’ll be working with: Window boxes? A classic planter? A group of planters? Terracotta or ceramic pots are wonderful and classic and you can always group several together. Personally, I love vintage urns. If you want something sizeable, whiskey barrels are great for larger arrangements that include grasses and shrubs. Wooden troughs are great too, especially for herb planters. Think outside the box and get creative — you never know what you might have lying around that you could use.
Prep your container. Next, make sure that your containers have drainage holes in the bottom. If they don’t, water will become stagnant at the bottom and rot the roots of plants, eventually killing them. Your potting soil should not be too dense or heavy. Shop for organic potting soil if possible. Fill your container to a few inches below the surface to avoid overspill; if the soil and plant level is too high in the container, the water will overflow when you water them, creating a mess. You can always fill in with more soil at the end.
Plan your containers before planting. Lay out the plants and seedlings that you have before you start planting. Make sure you like how everything looks together; this is a much easier time to move things around than after you start planting. If you feel like you’re missing something, you can always use a leftover pot as a placeholder during planting to create a space for something later.
Now you’re ready to plant. Don’t be afraid to pull off about half of the roots from the bottom of your plants when planting; this will encourage new root growth. You can feel free to plant things quite tightly in your boxes — not too squished, but you don’t have to leave as much room as you might think.
Don’t over- or under-water your containers. How much and how often you water your container will depend on the spot it is located. In a sunnier spot, a container will dry out more quickly. Keep an eye on your containers and feel the soil before watering. If they’re dry, water away. If they’re damp, water a little; and if they are still quite wet, you can hold off watering for at least another day or two. We usually water two to three times per week in the summer, depending on how hot and dry it is. We water at least until the water comes out the bottom drainage holes, and even more in hot sunny weather.
It’s also a good idea to fertilize your containers every couple of weeks in the late spring and as often as once a week in July and August. I prefer Neptune’s Harvest Flowering Formula liquid fertilizer. Don’t be shy with it; look at the ratios and go a little heavy.
Deadhead and shape at least once a week. Snip and trim back plants in your container and shape them as they grow; fertilize afterwards to promote continued growth and blooms. While you’re doing that, you can also keep an eye out for bugs and spray the plants with neem oil if you notice anything odd.
Choosing Plants for Your Container
Start in the center. If I’m designing a large planter such as a whiskey barrel, a large concrete pot, or a large square planter, I usually pick either one very large centerpiece plant like a tropical or ornamental plant (gardenia, euryops, tibouchina, mandevilla, hibiscus, etc.) or a grass or a hydrangea. Then I surround it with smaller annuals. (Grasses are great as centerpieces in containers or for height in window boxes. They grow and change through the season and most produce beautiful plumes that add interest.) Or I pick about three mid-sized annuals or perennials and group them together in the center, surrounded by plants gradually decreasing in size, with smaller annuals around the edges.
Repeat patterns. In a long window box, I usually repeat a general pattern, with slight variations here and there for interest. Heights can vary. Or, if you like a more streamlined look, you can plant only one or two things and let them do their thing. One of the homes we take care of has window boxes of strictly pink and purple or white petunias which drape down over the boxes as they grow for a gorgeous look.
Use perennials. It’s okay to use perennials in containers; mid-height perennials are perfect, and the bonus is that after the season is done, you can plant them in your garden. Heuchera and tiarella add great texture and colored foliage as well as the bonus of delicate blooms. There are many varieties and colors of these from which to choose. Brunnera has beautiful foliage that lasts all summer long. There is a variegated version as well.
Consider these annuals. Three annuals — verbenas, lantanas and petunias — make up the bulk of the annual material that we use for pots, with some additions of course. Depending on your taste, here too are a wide variety of colors and textures and growing habits (some are trailing, some mounding). Some of our favorites are peach verbena, “Homestead Purple” verbena (these trail a bit more and add volume to pots), and trailing purple or white lantana.
Lobelia is great for its smaller flowers and volume, and it offers a blue color that is hard to find elsewhere. Diascia (particularly a variety called “My Darling Melon”) is a lovely plant with small, bell-shaped flowers. Browallia is a sweet, delicate annual that works in part-sun pots, too. There are endless possibilities depending on your personal preferences. Felicia, brachyscome, bidens, and marguerite daisies (all members of the aster family) are each wonderful.
Of course, geraniums are a mainstay for the cottage look; the variety of colors is enormous. In wider pots we love to put salvias in the center for height and color. Tropical plants can be fun additions, too. Angelonia is another — a pretty flower that’s perennial in southern zones but grown as an annual here.
Don’t forget vines. I love adding a non-flowering vine around the edges of a container to add another dynamic. Sweet potato vines are great (“Sweet Caroline,” “Sweetheart Red,” and “Blackie” are my go-tos), as well as dichondra, vinca, or ivy for less sunny pots. If you have a backdrop or trellis behind your pot, you can add clematis (Sweet Autumn is great), thunbergia, or morning glory vines in the back, and through the season they will climb and add to the lushness and color of the container.
Ruby Hoy lives in West Tisbury, and is a part of landscape and garden design company Wild Violets.
__________________
Photo Inspiration
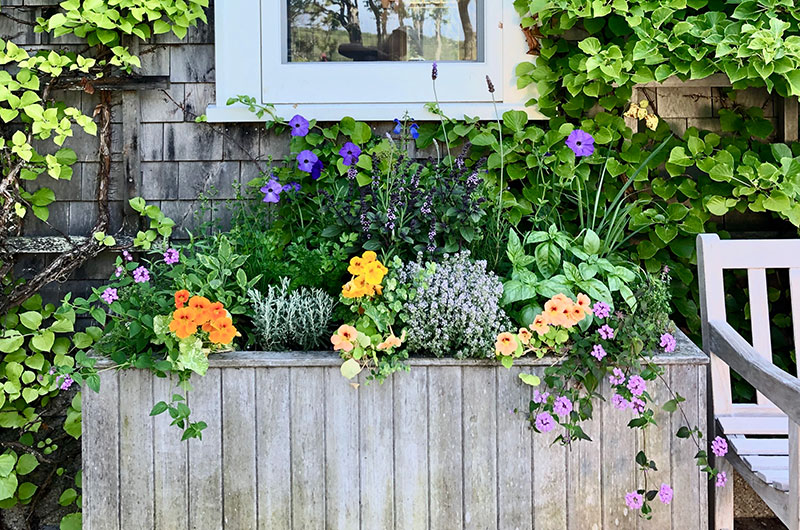
A Window Box of Herbs and Flowers
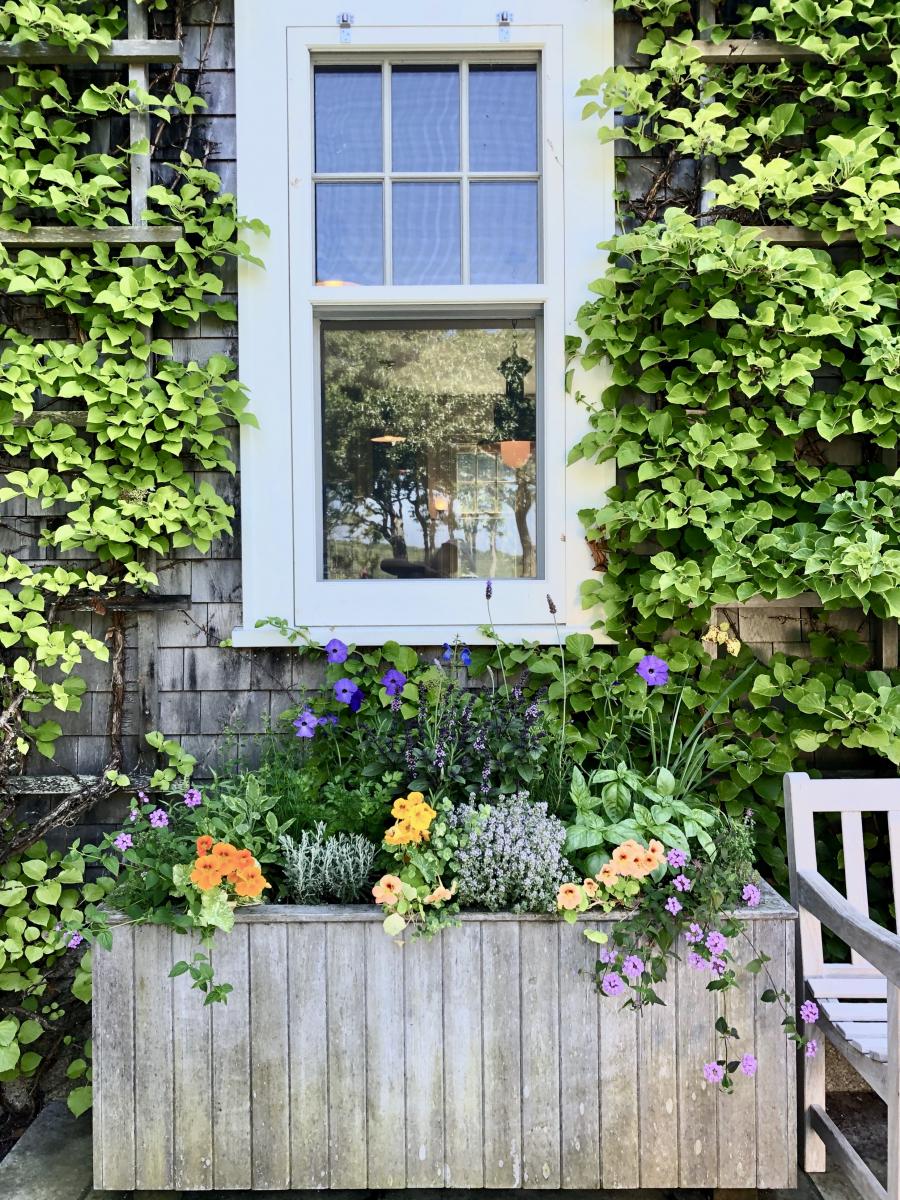
Annuals add color to this herb box. In front, purple lantana and peach nasturtiums mix with English thyme (right) and santolina (left). Behind those, from left: sage, chives, oregano, parsley, purple basil, lavender, and Genovese basil. This planter will evolve through the summer, and will need to be trimmed (or harvested!) to maintain space for each plant.
Multiple Herb Containers
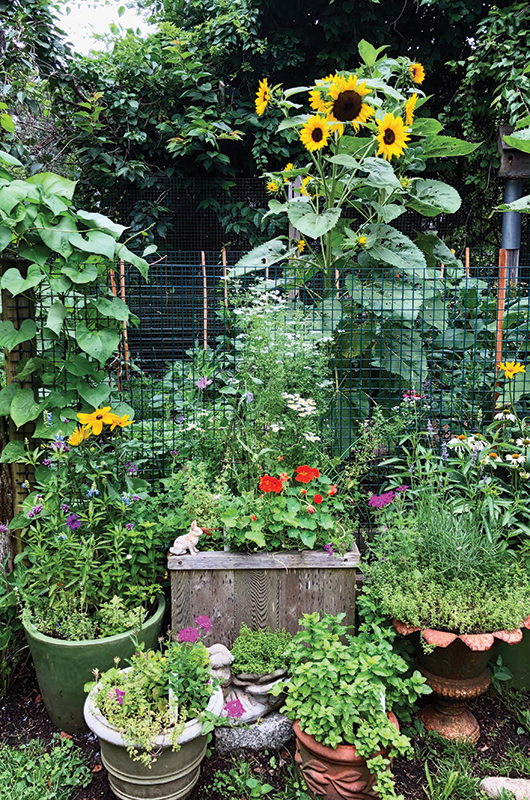
Another great way to create your own little herb garden is to use different types of containers at different heights. From right: The urn features lavender for height with thyme around the outside; a terra cotta planter for mint alone; a wooden box with nasturtium, coriander, parsley and thyme; a small planter with annual flowers for added color; a pot with oregano, and salvia added for color.
Herb Box
This herb box is lined with gravel for good drainage and features a variety of heights and textures for interest. The large oregano plant on the left is a fast-spreading perennial that must be tamed periodically or it will take over. In the back are two rosemary topiaries for height. Middle row, from left: Thai basil, parsley, lemon verbena, tarragon, garlic chives, Genovese basil, chives. Front row, from left: nasturtium, English thyme, purple basil.
A Flower Box in Early and Late Season
Here are two views of the same window box. The photo on the top was taken in the early part of the season; the one on the bottom a month or so later. This box features blue fescue grass for height and two varieties of heuchera for foliage interest. White geraniums alternate with purple petunias, verbena “Homestead Purple,” peach verbena, white and green petunia, and some dark potato vine.
A Box of Petunias
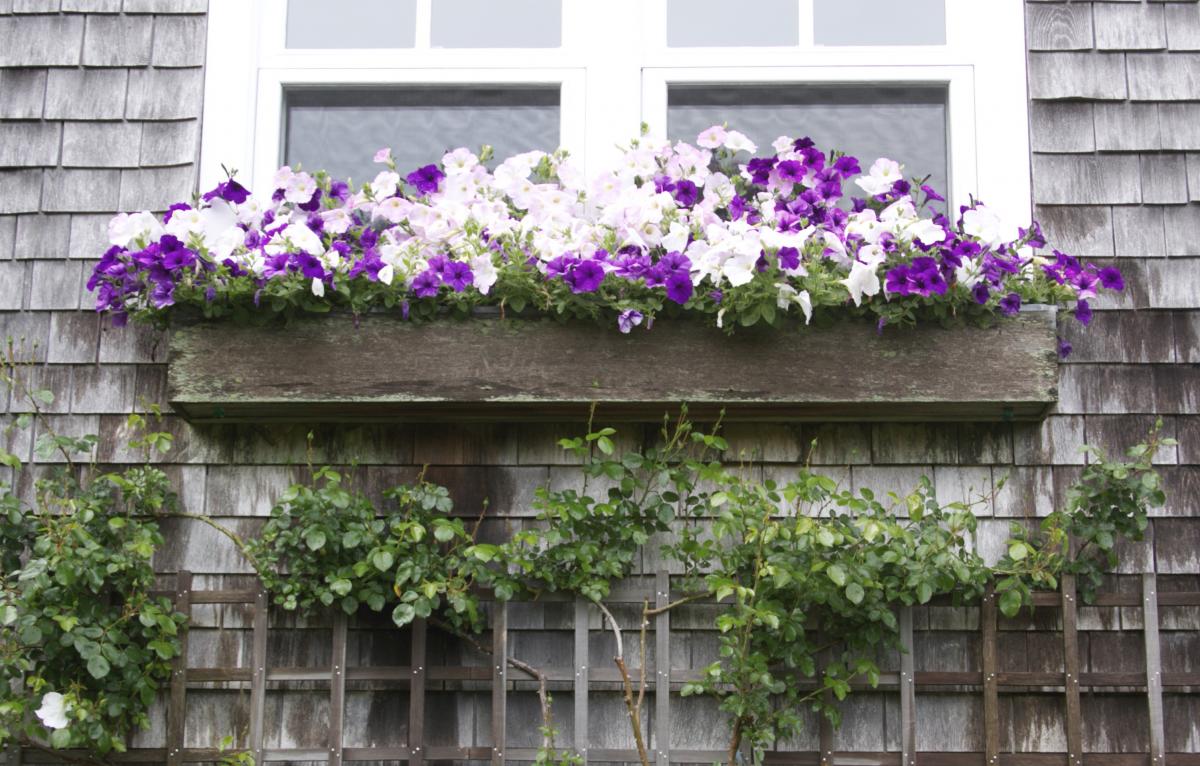
Here’s an example of a monoculture window box with only petunias. They offer lush growth and a simple look for a cottage-style window box.
A Simple Cottage-Style Box
This window box is also perfect for a cottage. It has a soft look with a few pops of color. Geraniums offer some height; blue lobelia, pink million bells, white bacopa (the trailing plant in front), verbena “Homestead Purple,” and white verbena complete the look
Urn, Early and Late Season
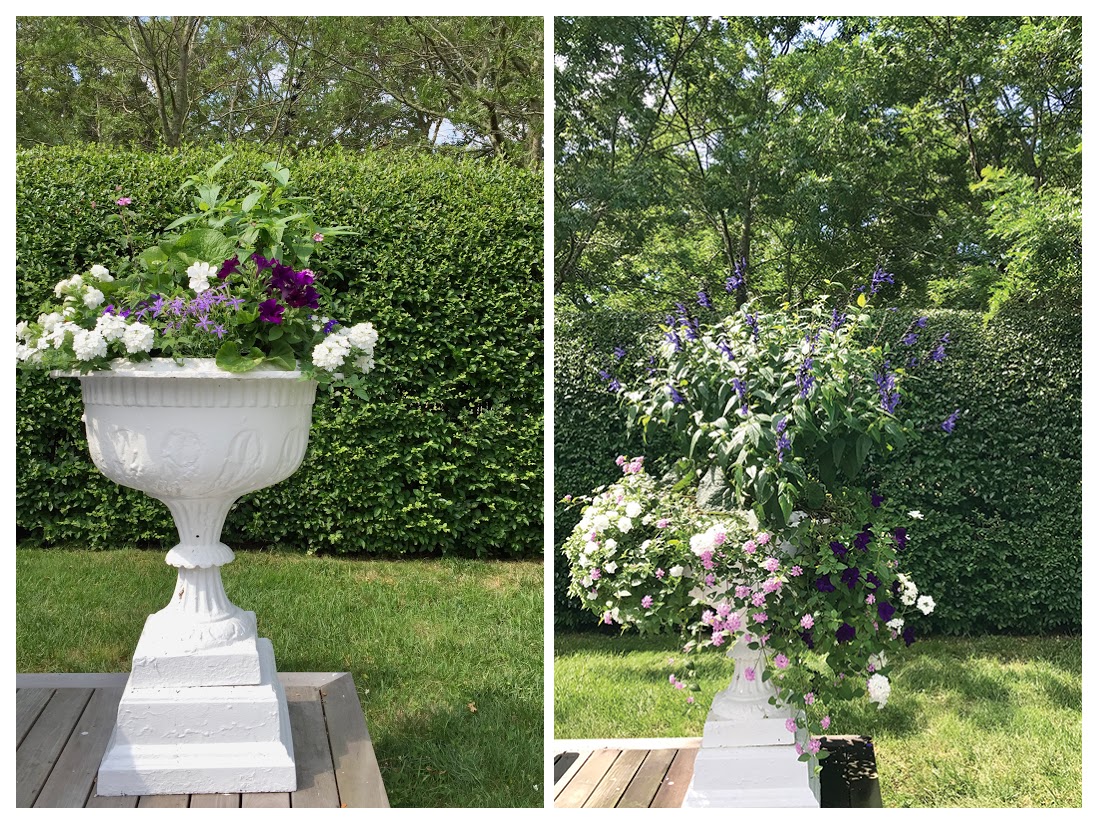
The photo on the left shows the urn just after planting. It contains salvia “Indigo Spires,” brunnera, white verbena, isotoma, purple petunias, trailing purple lantana, and white geranium. On the right is the urn weeks later. You can really see how it changes throughout the season.
Shade Pot, Two Different Years
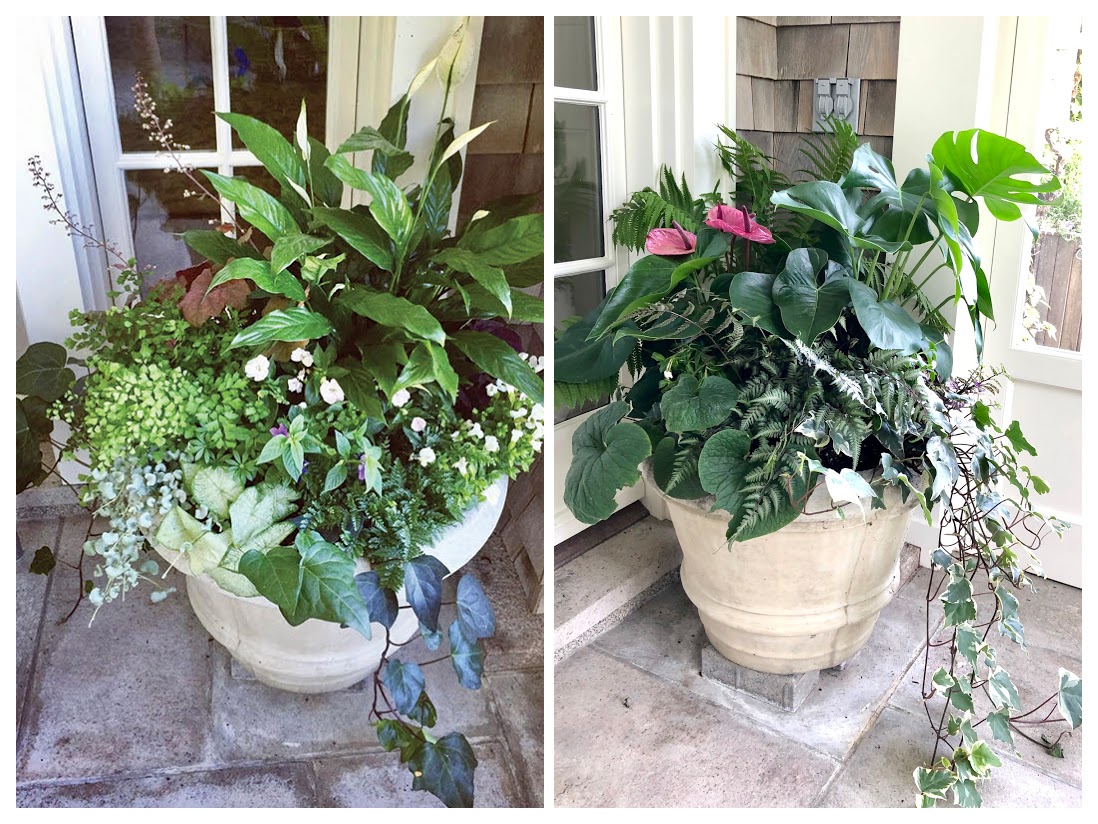
In these two photos, you see the same shade pot, on a screened porch, planted in two different years. The idea with these pots, since they never get much sun and never really dry out, is to create texture and a little color from the plants we have to work with. We use spathiphyllums (peace lilies) and different-sized ferns as the main plants. We use ivy and dichondra as trailing components and brunnera or heuchera for texture. Monstera is a great tropical for wetter, shadier areas. Elephant ears can add contrasting texture, too.
Patio Pot
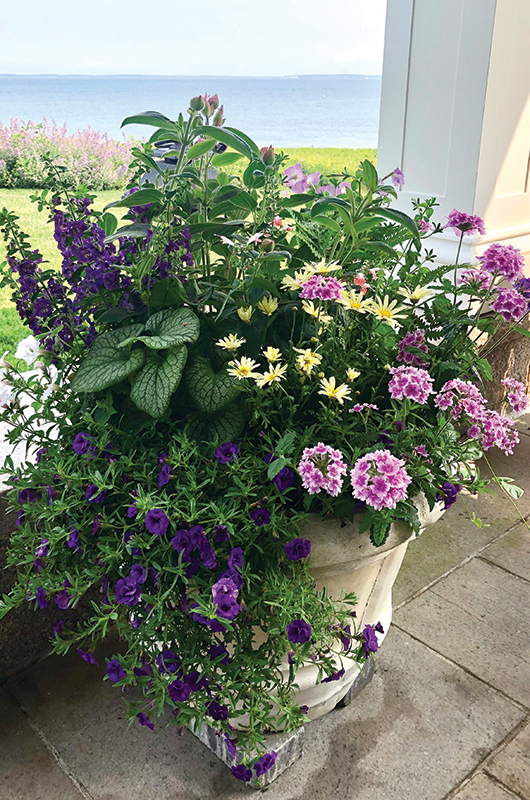
This is a very asymmetrical container, located on a part-shade patio. I used a large purple angelonia, variegated brunnera, a small tibouchina, some light pink salvias, and yellow marguerite daisies to form the bulk of this planter. I also used a decent-sized pink verbena and a small hanging basket of purple double million bells to add a draping effect right away.
Waterside Planter
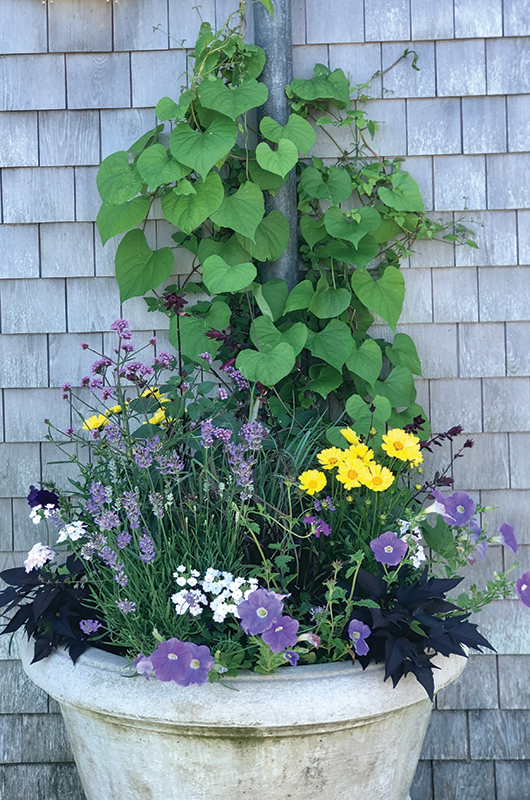
This is a waterside planter early in the season. We attached a fishing line to the gutter in the back of this pot for morning glory vine and clematis to climb up. Pink salvia, verbena bonariensis, panicum grass, and pennisetum “Rubrum” form the center/rear of this container, followed by coreopsis and lavender, and petunias, white verbena, verbena “Homestead purple,” and black sweet potato vine around the edge. Throughout the season, these will grow and trail over the sides of the container. The grasses and salvia will grow and form a tall centerpiece.


Comments